QuakeC
Monday, 3rd September 2007
This journal hasn't been updated for a while, I know. That doesn't mean that work on the Quake project has dried up - on the contrary, a fair amount of head-way has been made!
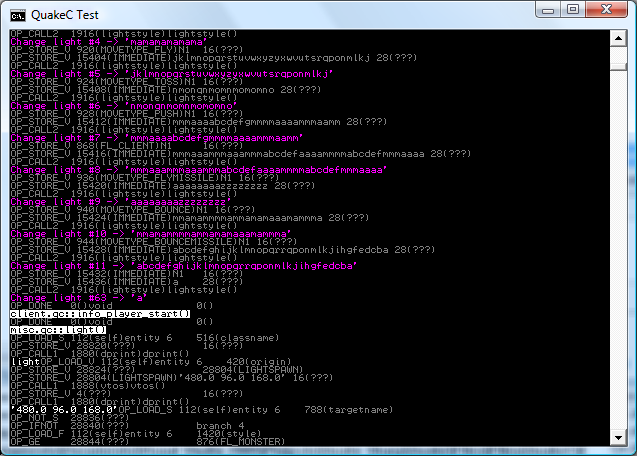
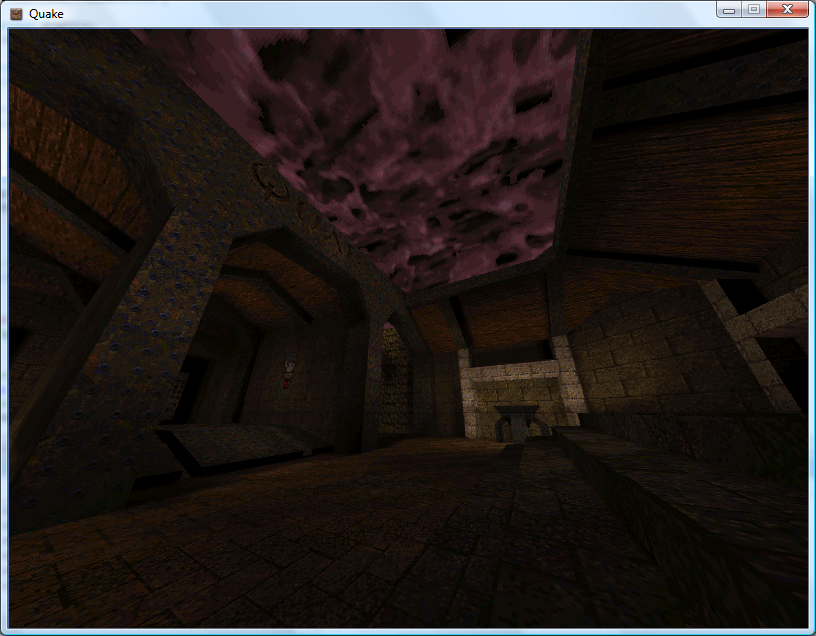
The problem is that screenshots like the above are really not very interesting at all. 
As far as I can tell, Quake's entity data (at runtime) is stored in a different chunk of memory to the memory used for global variables. I've had numerous problems getting the code to work - most of which caused by pointer confusion. Four bytes are generally used for a field (vectors use three singles, so you have 12 bytes), so I've tried multiplying and dividing offsets by four to try and get it all to work.
The basic entity data is stored in the .bsp file. It takes the following form:
{
"worldtype" "2"
"sounds" "6"
"classname" "worldspawn"
"wad" "gfx/base.wad"
"message" "the Slipgate Complex"
}
{
"classname" "info_player_start"
"origin" "480 -352 88"
"angle" "90"
}
{
"classname" "light"
"origin" "480 96 168"
"light" "250"
}
classname describes the type of the entity, and the other key-value pairs are used to adjust the entity's properties. All entities share the same set of fields, which are declared in a special section of the progs.dat file.
For each classname there is a matching QuakeC function. As far as I can tell the trick is to decode an entity then invoke its QuakeC method.
void() light =
{
	if (!self.targetname)
	{	// inert light
		remove(self);
		return;
	}

	if (self.style >= 32)
	{
		self.use = light_use;
		if (self.spawnflags & START_OFF)
			lightstyle(self.style, "a");
		else
			lightstyle(self.style, "m");
	}
};
As you can probably guess, if a light entity is not attached to a particular target it is automatically removed from the world as it serves no useful function (the lightmaps are prerendered, after all). A similar example comes from the monsters which remove themselves if deathmatch is set. The QuakeC code also contains instructions on setting which model file to use for each entity and declares the animation frame sequences, so is pretty important to get working. 
I have a variety of directories stuffed with images on my website, and (thankfully) I have used a faintly sane naming convention for some of these. I knocked together a PHP script which reads the files from these directories and creates a nifty sort of gallery. It automatically generates thumbnails and is quite fast. As I don't have an internet connection at home it's more practical to be able to just drop files into a directory and have the thing automatically update rather than spend time updating a database.
PHP source code (requires GD).
It's INI file driven. The two files are config.ini:
[Site]
base_dir=../../ ; Base directory of the site
; I put this in bin/gallery, so need to go up two levels :)

[Files]
valid_extensions=jpg,gif,png ; Only three that are supported

[Thumbnails]
max_width=320
max_height=256
quality=90 ; Thumbnail JPEG quality
...and galleries.ini:
[VB6 Terrain]
key=te                 ; Used in gallery=xyz parameter
path=projects/te       ; Image location, relative to base_dir
date_format=ddmmyyyyi  ; Filename format, where i = index.

[MDX DOOM]
key=doom
path=images/doom
ignore_extensions=jpg     ; Can be used to ignore extensions.
date_format=yyyy.mm.dd.ii
The index in the date format is for files that fall on the same date. Historically I used a single letter (01012003a, 01012003b), currently I use a two-digit integer (2003.01.01.01).
If a text file with the name of the image + ".txt" is found, that is used as a caption. (eg, /images/quake/2003.01.01.01.png and /images/quake/2003.01.01.01.png.txt).
It's not designed to be bullet-proof (and was written very very quickly) but someone might find it a useful base to work on.
8-bit Raycasting Quake Skies and Animated Textures
Monday, 20th August 2007
All of this Quake and XNA 3D stuff has given me a few ideas for calculator (TI-83) 3D.
One of my problems with calculator 3D apps is that I have never managed to even get a raycaster working. Raycasters aren't exactly very tricky things to write.
So, to help me, I wrote a raycaster in C#, limiting myself to the constraints of the calculator engine - 96×64 display, 256 whole angles in a full revolution, 16×16 map, that sort of thing. This was easy as I had floating-point maths to fall back on.
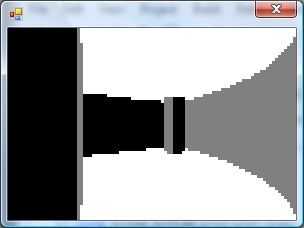
With that done, I went and ripped out all of the floating-point code and replaced it with fixed-point integer arithmetic; I'm using 16-bit values, 8 bits for the whole part and 8 bits for the fractional part.
From here, I just rewrote all of my C# code in Z80 assembly, chucking in debugging code all the way through so that I could watch the state of values and compare them with the results from my C# code.

The result is rather slow, but on the plus side the code is clean and simple. The screen is cropped for three reasons: it's faster to only render 64 columns (naturally), you get some space to put a HUD and - most importantly - it limits the FOV to 90°, as the classic fisheye distortion becomes a more obvious problem above this.

I sneaked a look at the source code of Gemini, an advanced raycaster featuring textured walls, objects and doors. It is much, much faster than my engine, even though it does a lot more!
It appears that the basic raycasting algorithm is pretty much identical to the one I use, but gets away with 8-bit fixed point values. 8-bit operations can be done significantly faster than 16-bit ones on the Z80, especially multiplications and divisions (which need to be implemented in software). You can also keep track of more variables in registers, and restricting the number of memory reads and writes can shave off some precious cycles.
Some ideas that I've had for the raycaster, that I'd like to try and implement:
- Variable height floors and ceilings. Each block in the world is given a floor and ceiling height. When the ray intersects the boundary, the camera height is subtracted from these values, they are divided by the length of the ray (for projection) and the visible section of the wall is drawn. Two counters would keep track of the upper and lower values currently drawn to to keep track of the last block's extent (for occlusion) and floor/ceiling colours could be filled between blocks.
- No texturing: wall faces and floors/ceilings would be assigned dithered shades of grey. I think this, combined with lighting effects (flickering, shading), would look better than monochrome texture mapping - and would be faster!
- Ray-transforming blocks. For example, you could have two 16×16 maps with a tunnel: the tunnel would contain a special block that would, when hit, tell the raycaster to start scanning through a different level. This could be used to stitch together large worlds from small maps (16×16 is a good value as it lets you reduce level pointers to 8-bit values).
- Adjusting floors and ceilings for lifts or crushing ceilings.
As far as the Quake project, I've made a little progress. I've added skybox support for Quake 2:
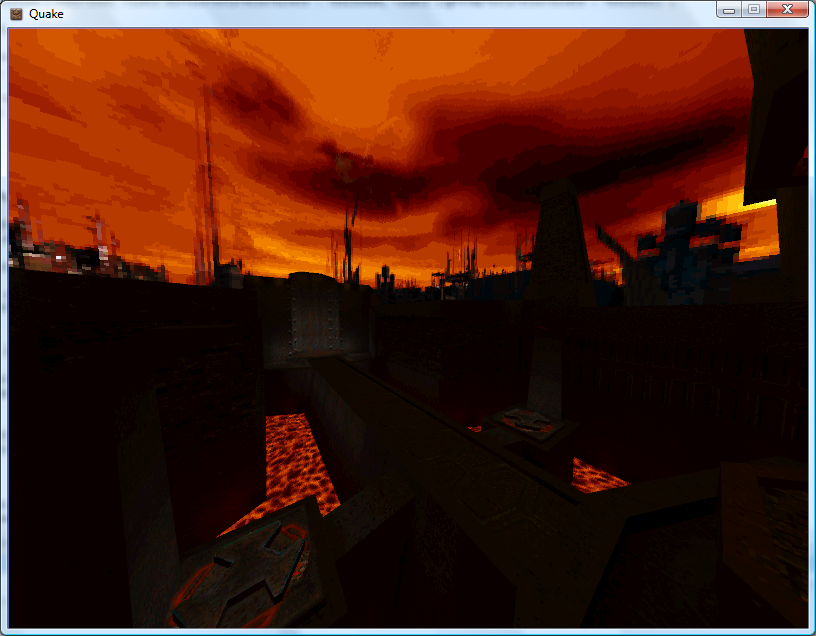
Quake 2's skyboxes are simply made up of six textures (top, bottom, front, back, left, right). Quake doesn't use a skybox. Firstly, you have two parts of the texture - one half is the sky background, and the other half is a cloud overlay (both layers scroll at different speeds). Secondly, it is warped in a rather interesting fashion - rather like a squashed sphere, reflected in the horizon:
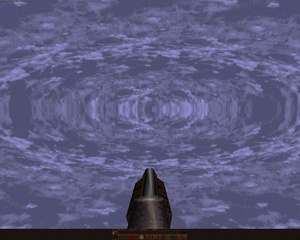
For the moment, I'm just using the Quake 2 box plus a simple pixel shader to mix the two halves of the sky texture.
I daresay something could be worked out to simulate the warping.
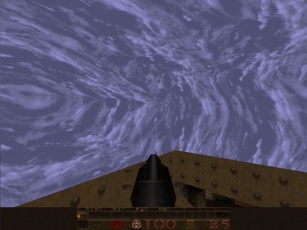
The above is from GLQuake, which doesn't really look very convincing at all.
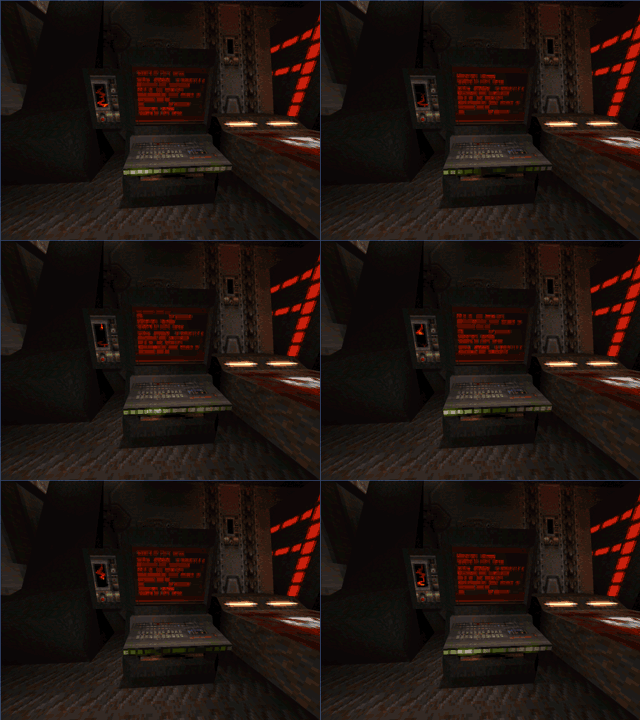
I've reimplemented the texture animation system in the new BSP renderer, including support for Quake 2's animation system (which is much simpler than Quake 1's - rather than have magic texture names, all textures contain the name of the next frame in their animation cycle).
QuakeC VM
Wednesday, 15th August 2007
I've started serious work on the QuakeC virtual machine.
The bytecode is stored in a single file, progs.dat. It is made up of a number of different sections:
- Definitions data - an unformatted block of data containing a mixture of floating point values, integers and vectors.
- Statements - individual instructions, each made up of four short integers. Each statement has an operation code and up to three arguments. These arguments are typically pointers into the definitions data block.
- Functions - these provide a function name, a source file name, storage requirements for local variables and the address of the first statement.
On top of that are two tables that break down the definitions table into global and field variables (as far as I'm aware this is only used to print "nice" names for variables when debugging, as it just attaches a type and name to each definition) and a string table.
The first few values in the definition data table are used for predefined values, such as function parameters and return value storage.
Now, a slight problem is how to handle these variables. My initial solution was to read and write types strictly as particular types using the definitions table, but this idea got scrapped when I realised that the QuakeC bytecode uses the vector store opcode to copy string pointers, and a vector isn't much use when you need to print a string.
I now use a special VariablePointer class that internally stores the pointer inside the definition data block, and provides properties for reading and writing using the different formats.
/// <summary>Defines a variable.</summary>
public class VariablePointer {

	private readonly uint Offset;

	private readonly QuakeC Source;

	private void SetStreamPos() { this.Source.DefinitionsDataReader.BaseStream.Seek(this.Offset, SeekOrigin.Begin); }

	public VariablePointer(QuakeC source, uint offset) {
		this.Source = source;
		this.Offset = offset;
	}

	#region Read/Write Properties

	/// <summary>Gets or sets a floating-point value.</summary>
	public float Float {
		get { this.SetStreamPos(); return this.Source.DefinitionsDataReader.ReadSingle(); }
		set { this.SetStreamPos(); this.Source.DefinitionsDataWriter.Write(value); }
	}

	/// <summary>Gets or sets an integer value.</summary>
	public int Integer {
		get { this.SetStreamPos(); return this.Source.DefinitionsDataReader.ReadInt32(); }
		set { this.SetStreamPos(); this.Source.DefinitionsDataWriter.Write(value); }
	}

	/// <summary>Gets or sets a vector value.</summary>
	public Vector3 Vector {
		get { this.SetStreamPos(); return new Vector3(this.Source.DefinitionsDataReader.BaseStream); }
		set {
			this.SetStreamPos();
			this.Source.DefinitionsDataWriter.Write(value.X);
			this.Source.DefinitionsDataWriter.Write(value.Y);
			this.Source.DefinitionsDataWriter.Write(value.Z);
		}
	}

	#endregion

	#region Extended Properties

	public bool Boolean {
		get { return this.Float != 0f; }
		set { this.Float = value ? 1f : 0f; }
	}

	#endregion

	#region Read-Only Properties

	/// <summary>Gets a string value.</summary>
	public string String {
		get { return this.Source.GetString((uint)this.Integer);  }
	}

	public Function Function {
		get { return this.Source.Functions[this.Integer]; }
	}

	#endregion
}
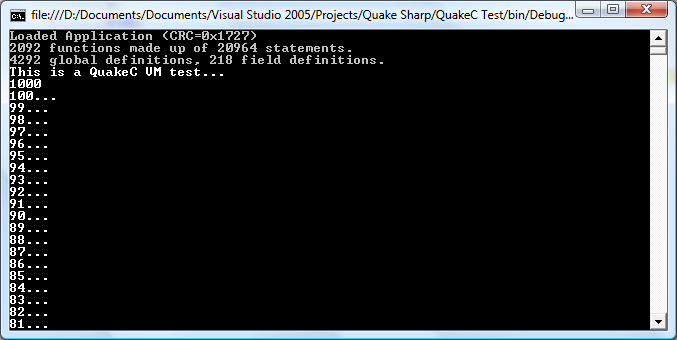
If the offset for a statement is negative in a function, that means that the function being called is an internally-implemented one. The source code for the test application in the screenshot at the top of this entry is as follows:
float testVal;

void() test = {
	dprint("This is a QuakeC VM test...\n");

	testVal = 100;
	dprint(ftos(testVal * 10));
	dprint("\n");

	while (testVal > 0) {
		dprint(ftos(testVal));
		testVal = testVal - 1;
		dprint("...\n");
	}
	dprint("Lift off!");

};
There's a huge amount of work to be done here, especially when it comes to entities (not something I've looked at at all). All I can say is that I'm very thankful that the .qc source code is available and the DOS compiler runs happily under Windows - they're going to be handy for testing.
Vista and MIDI
Tuesday, 14th August 2007
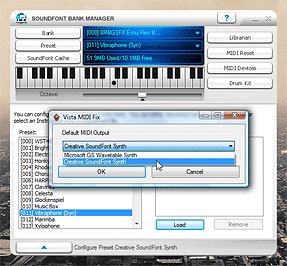
I have a Creative Audigy SE sound card, which provides hardware MIDI synthesis. However, under Vista, there was no way (that I could see) to change the default MIDI output device to this card, meaning that all apps were using the software synthesiser instead.
Vista MIDI Fix is a 10-minute application I wrote to let me easily change the default MIDI output device. Applications which use MIDI device 0 still end up with the software synthesiser, unfortunately.
To get the hardware MIDI output device available I needed to install Creative's old XP drivers, and not the new Vista ones from their site. This results in missing CMSS, but other features - such as bass redirection, bass boost, 24-bit/96kHz output and the graphical equaliser - now work.
The Creative mixer either crashes or only displays two volume sliders (master and CD audio), which means that (as far as I can tell) there's no easy way to enable MIDI Reverb and MIDI Chorus.
Quake 2 PVS, Realigned Lightmaps and Colour Lightmaps
Friday, 10th August 2007
Quake 2 stores its visibility lists differently to Quake 1 - as close leaves on the BSP tree will usually share the same visibility information, the lists are grouped into clusters (Quake 1 stored a visibility list for every leaf). Rather than go from the camera's leaf to find all of the other visible leaves directly, you need to use the leaf's cluster index to look up which other clusters are visible, then search through the other leaves to find out which reference that cluster too.
In a nutshell, I now use the visibility cluster information in the BSP to cull large quantities of hidden geometry, which has raised the framerate from 18FPS (base1.bsp) to about 90FPS.
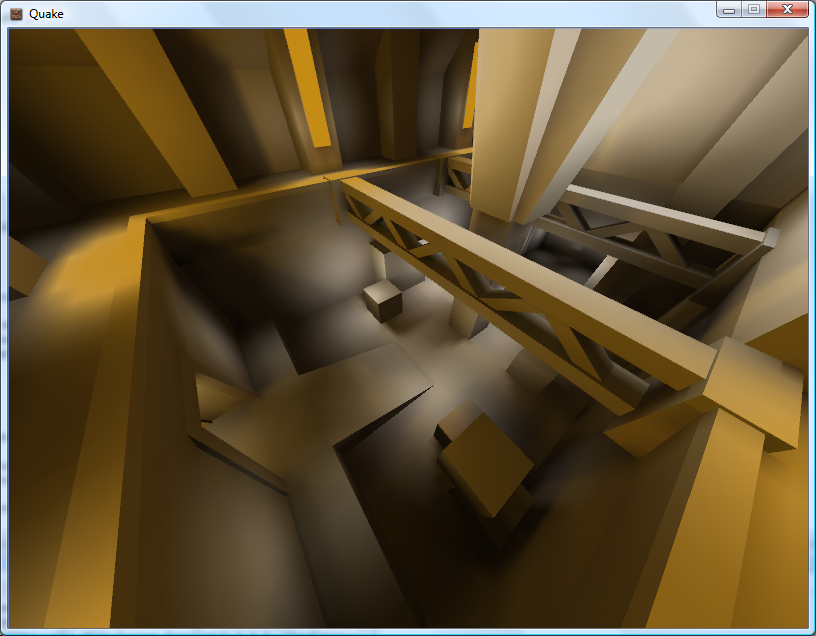
I had a look at the lightmap code again. Some of the lightmaps appeared to be off-centre (most clearly visible when there's a small light bracket on a wall casting a sharp inverted V shadow on the wall underneath it, as the tip of the V drifted to one side). On a whim, I decided that if the size of the lightmap was rounded to the nearest 16 diffuse texture pixels, one could assume that the top-left corner was not at (0,0) but offset by 8 pixels to centre the texture. This is probably utter nonsense, but plugging in the offset results in almost completely smooth lightmaps, like the screenshot above.
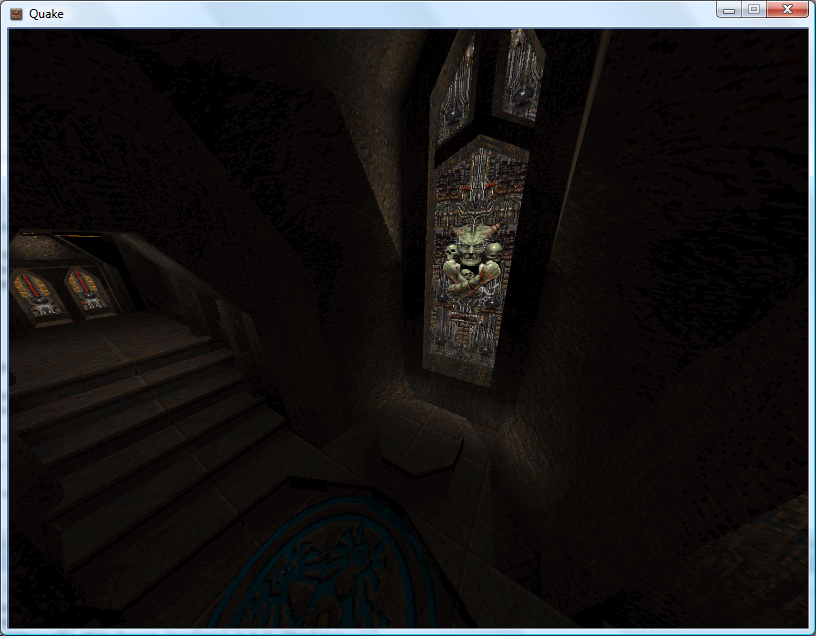
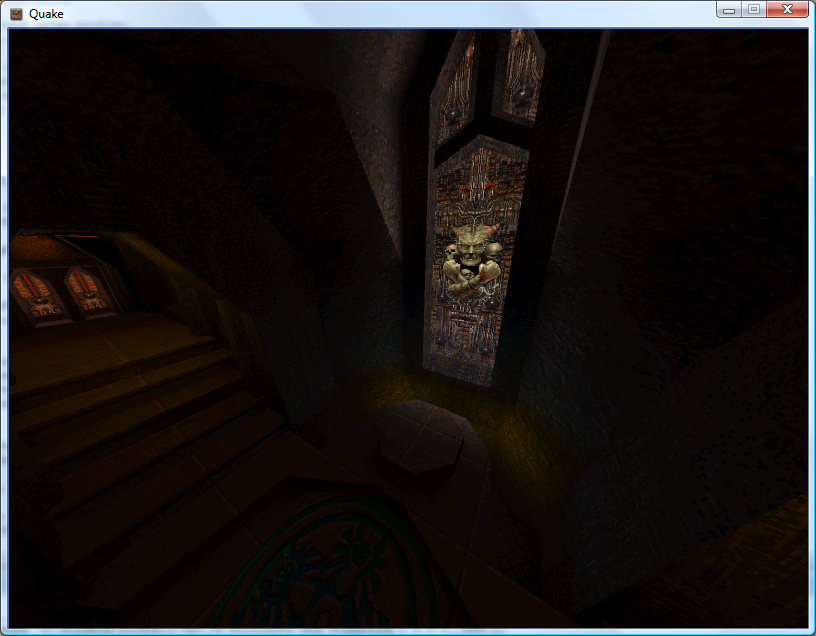
Before and after - coloured lightmaps.
I quite like Quake 2's colour lightmaps, and I also quite like the chunky look of the software renderer. I've modified the pixel shader for the best of both worlds. I calculate the three components of the final colour individually, taking the brightness value for the colourmap from one of the three channels in the lightmap.
float4 Result = 1;

ColourMapIndex.y = 1 - tex2D(LightMapTextureSampler, vsout.LightMapTextureCoordinate).r;
Result.r = tex2D(ColourMapSampler, ColourMapIndex).r;

ColourMapIndex.y = 1 - tex2D(LightMapTextureSampler, vsout.LightMapTextureCoordinate).g;
Result.g = tex2D(ColourMapSampler, ColourMapIndex).g;

ColourMapIndex.y = 1 - tex2D(LightMapTextureSampler, vsout.LightMapTextureCoordinate).b;
Result.b = tex2D(ColourMapSampler, ColourMapIndex).b;

return Result;